Building Multi-User ML2 applications with Photon Fusion
In this guide, you will learn how to use the Magic Leap 2 Photon Fusion package to create shared experiences for multiple co-located users. This will allow users to share and interact with the same virtual space. The guide is divided into the following parts:
- Part 1: Import the packages
- Part 2: Run the Marker Colocation scene
- Part 3: Configure a Custom Networking Scene
This guide assumes you have a basic understanding of Photon Fusion. To learn more, refer to the Fusion 101 guide provided in the Photon documentation.
Prerequisites
Before proceeding, ensure you have the following:
- Magic Leap 2 Unity project using the Universal Render Pipeline
- Photon account and Fusion app ID
- Local copy of the Photon Fusion unity package
- Established Wi-Fi connection on the headset
Part 1: Import the Packages
Import the Fusion Unity SDK Package
- Create a new URP project using the latest version of Unity 2022
- Configure your project using the Magic Leap Setup Tool
- Import the Fusion Unity SDK package
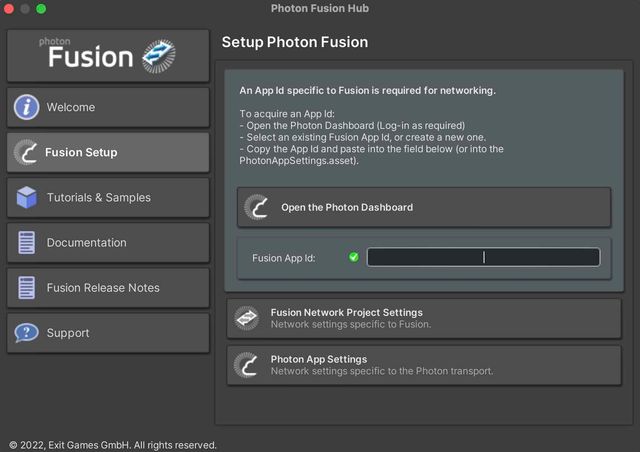
- Enter your app ID in the Photon Fusion Hub window.(Note: If the Fusion Hub doesn’t appear automatically after package import, you can open it by navigating to Fusion > Fusion Hub in the Unity menu.)
Set Permissions
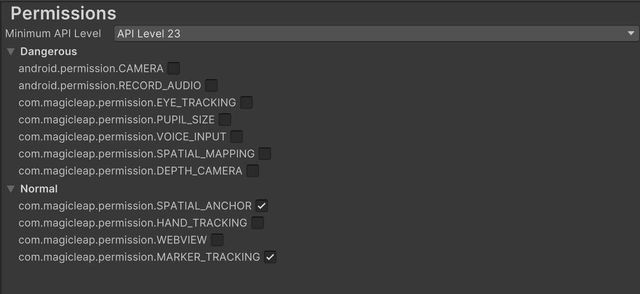
The package used in this example requires marker tracking and/or spatial anchors permissions. To enable these permissions, make sure you’ve enabled the Custom Manifest setting in Player settings as well as the following permissions (found in Edit > Project Settings > Magic Leap > Permissions):
Import the Magic Leap - Photon Fusion package
The Magic Leap Photon Fusion sample can be downloaded as a complete project or as a unity package. To import the sample into an existing project, open the Magic Leap Photon Fusion Example link in your web browser then select the latest release.
To import the package into the project: Select : Assets > Import Package > Custom Package from the menu
- In the file picker, choose the MagicLeap-PhotonFusion unity package In the Import Unity Package window, click the All button to ensure all the assets are selected, then click the Import button to import the assets
This package uses TextMeshPro to render UI text. To import the required components:
- Select Window > TextMeshPro > Import TMP Essentials to import the package.
Part 2: Run the Marker Colocation scene
The SimpleDemo uses a custom render pipeline to render the desktop camera as an AR background. To enable it:
- Navigate to Edit > Project Settings > Graphics and in the Scriptable Render Pipeline Settings, select the ML2-UniversalRenderPipeline asset.
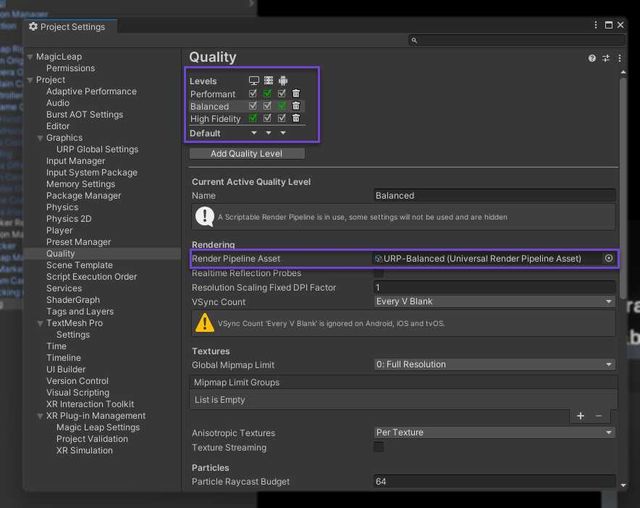
- Next, navigate to Quality Settings from the side menu and assign the ML2-UniversalRenderPipeline asset to the Render Pipeline Asset field for each of the quality levels.
This demo scene showcases networking between headsets and desktop clients. To run the demo:
- Select Fusion > Rebuild Prefab Table to configure the network objects so that they can be instantiated by Photon.
- Print out the AprilTag marker located in Assets > Magic Leap > PhotonFusionExample > Marker folder
- Select Assets > Magic Leap > PhotonFusionExample> MarkerColocation and open the scene
- Open the Build Settings window by selecting File > Build Settings from the menu. Click the Add Open Scenes button to add the current scene into the build.
- Power on your Magic Leap 2. After the boot sequence finishes, connect it to your computer.
- Click the Build And Run button to deploy the application to your device. Put on the headset.
Once the deployment is complete on the Magic Leap 2, you will be able to calibrate the scene to the marker by looking at the marker image and pressing the Menu button, and interact with the grabbable cubes in the scene using the Bumper.
Running Marker Colocation on Desktop
If you want to test the example with the desktop client, in the top Unity menu go to Magic Leap > Fusion Example > April Tag > Install to install the desktop April Tag library.
If you’re running the desktop client, you will be able to see the movement of the headset user and can calibrate to the marker by pressing the M key on the keyboard, as well as moving around the scene using the mouse.
Part 3: Configure a Custom Networking Scene
You can use the assets provided in the Magic Leap - Photon Fusion package to set up your own networking scene from scratch using the following steps:
Add Player Networking
- Create a new scene by selecting File > New Scene and then choosing the (Basic URP) template
- Delete the Main Camera object from the scene hierarchy
- In the Project window, navigate to the Assets > Magic Leap > PhotonFusionExample > Prefabs folder.
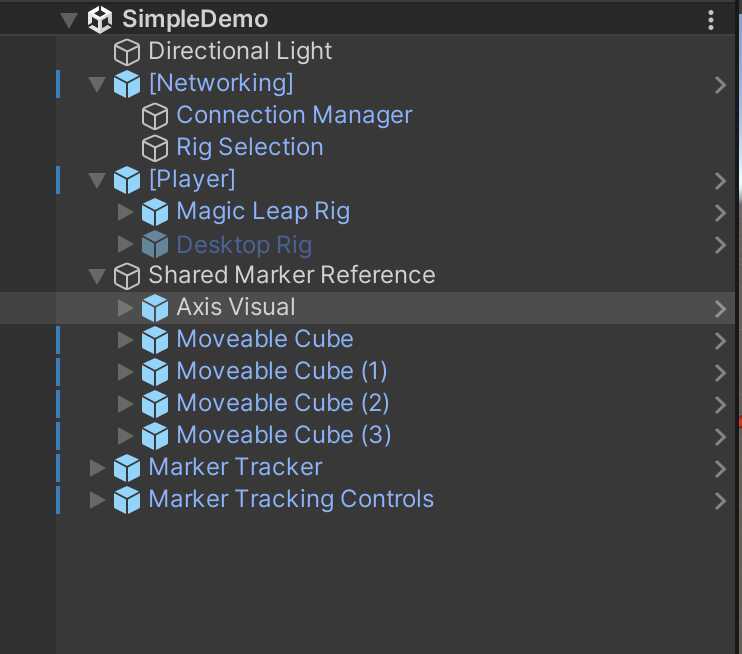
- Click-and-drag the following prefabs into the scene: [Networking] and [Player]
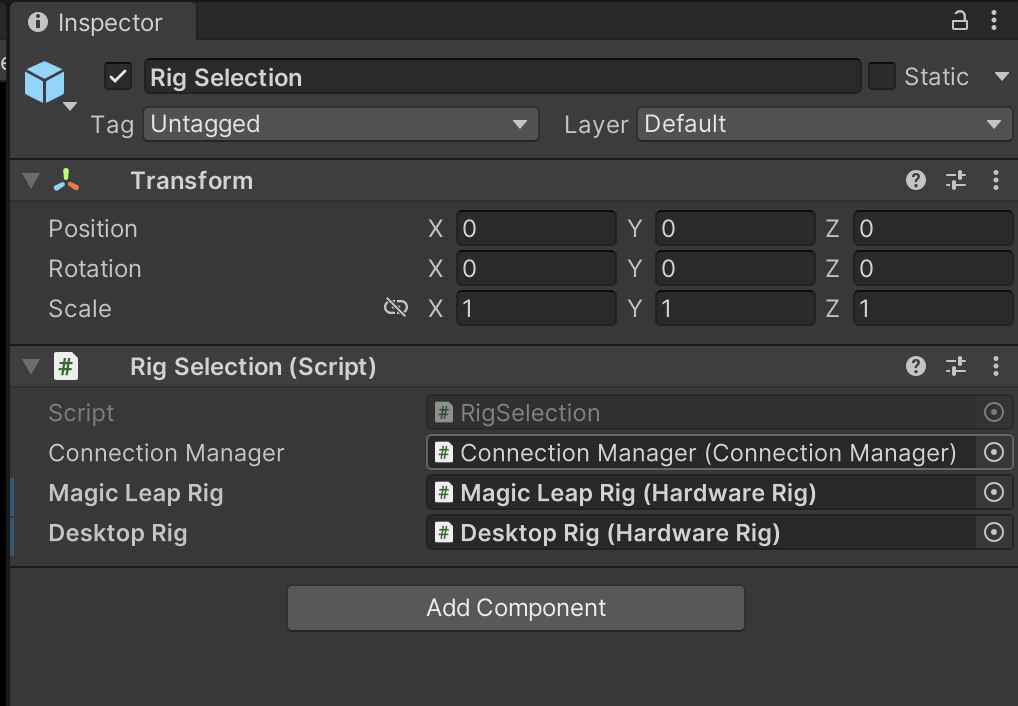
The [Networking] prefab contains two children: ConnectionManager and RigSelection.
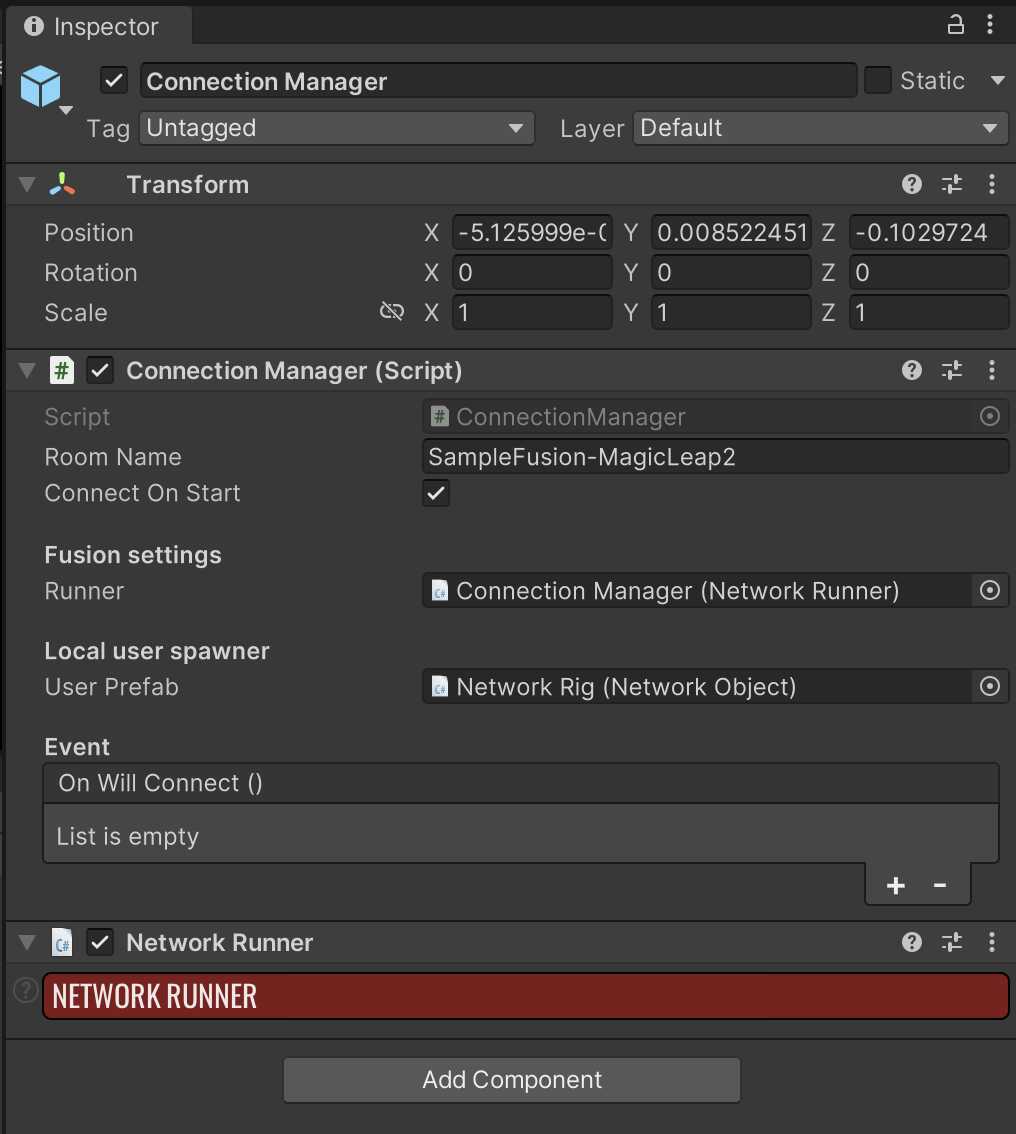
- ConnectionManager: Requires a room name (the same for all users to connect) and a user prefab with a NetworkRig, which contains the visual representation of the controller and headset as well as the Network Transform, Network Rig and Network Object components from Fusion.
- RigSelection: Allows switching between the Magic Leap rig and the Desktop rig depending on the platform. Inside the Rig Selection script fields for Magic Leap Rig and Desktop Rig, drag the corresponding objects nested inside the [Player] prefab that was added to the scene in step 4.
Set the Network Runner
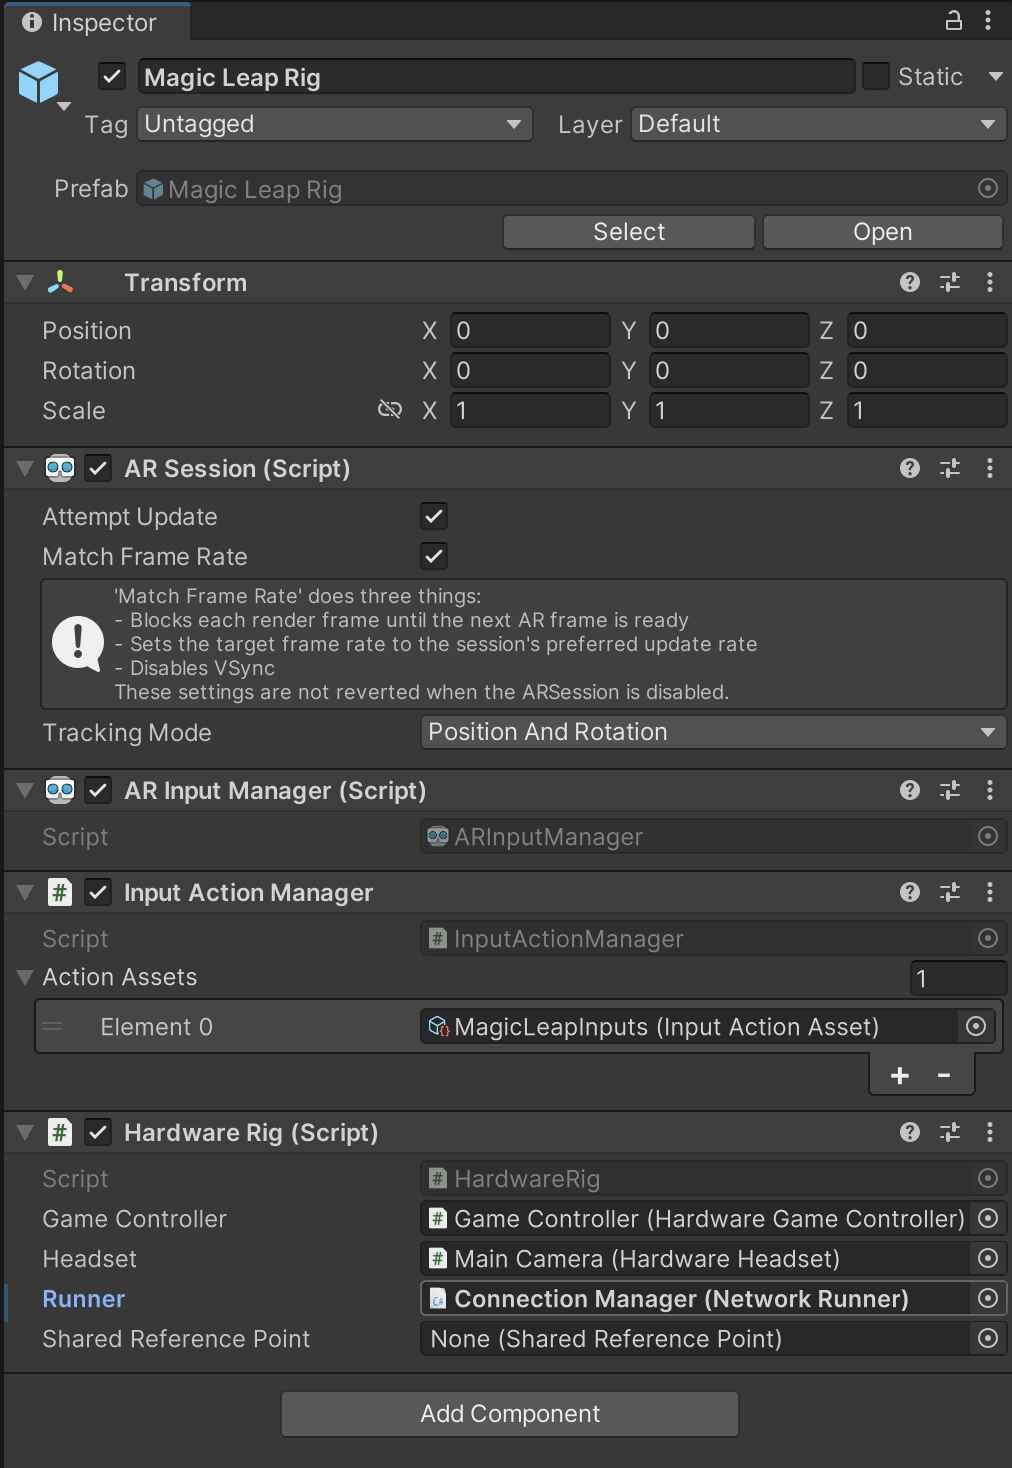
- Expand the [Player] prefab and select the Magic Leap Rig child object. In the Hardware Rig script, drag and drop the ConnectionManager object from the scene into the Runner field.
Create a Shared Reference
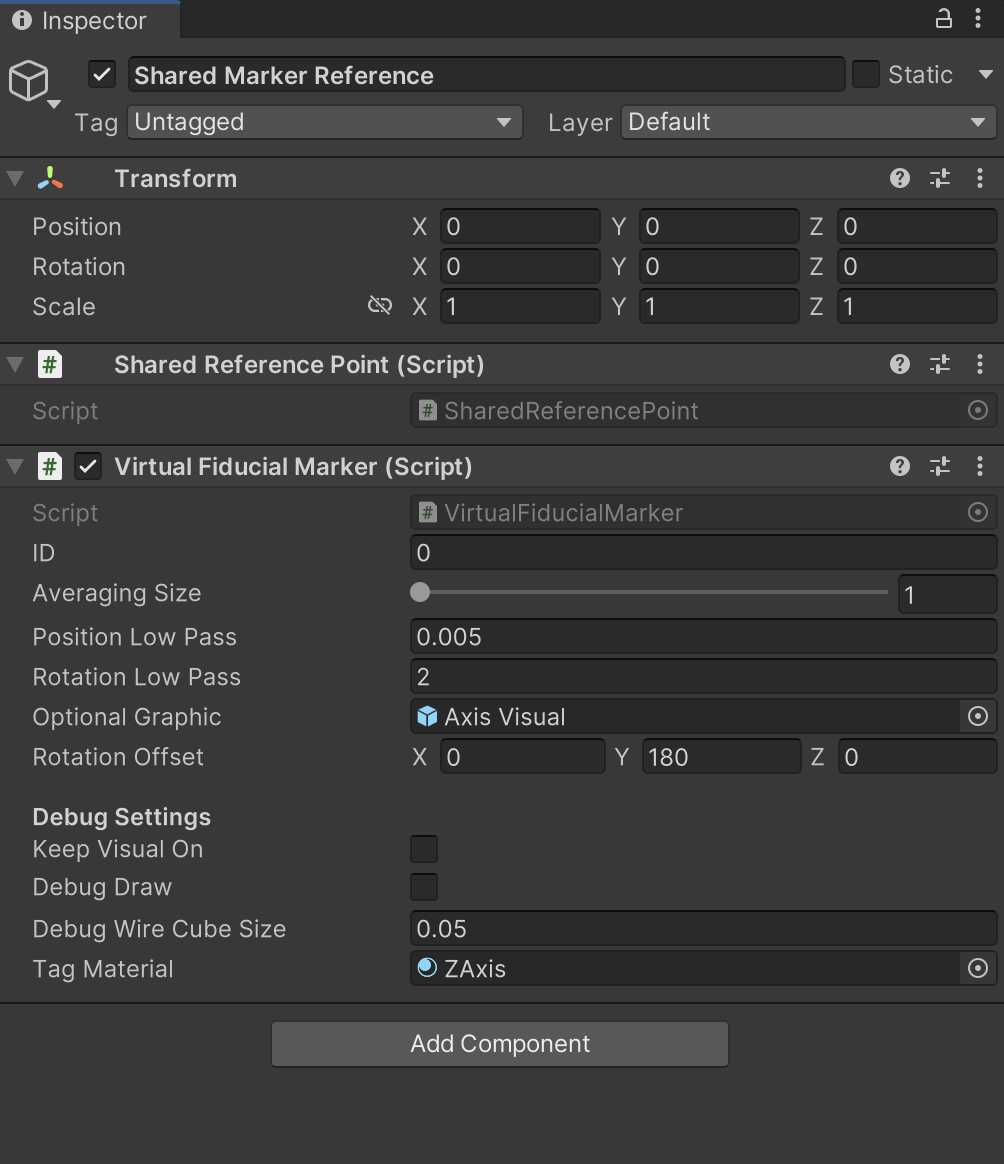
- Right-click in the scene hierarchy and select Create > Empty GameObject and rename it to Shared Marker Reference.
- Add the Shared Reference Point and Virtual Fiducial Marker script components to this object.
- In Assets > Magic Leap > PhotonFusionExample > Prefabs > Anchor, drag and drop the Axis Visual prefab to make it a child of the Shared Reference Point object in the scene.
- Then, with the Shared Marker Reference Selected, drag and drop the added Axis Visual from the scene into the Optional Graphic field of the Virtual Fiducial Marker script.
- Save the scene and hit Play to test the scene in Desktop mode. You will be able to click and drag the controller for the headset inside the Game Window.
- Go to File > Build Settings and add the open scene to the build order. Build and run the application on the headset. You will be able to see the controller prefab mapping to your controller, as well as view the Axis visual at the point where your headset was originally started in the room.
- In the editor, hit Play and move the cursor in the game window, which will now allow you to see both players moving in the same space.
Add Interactable Objects
- From Assets > Magic Leap > PhotonFusionExample > Prefabs, drag and drop the Movable Cube prefab into the scene and save the scene.
- Build and run the updated scene on the headset.
- You will now see the Movable Cube prefab in the scene. The text above the cube will say “You now have state authority over this object”, which happens if you are the user who started this server first. You can pick up and move the cube by hovering the controller over the cube and pressing the Bumper button.
- Hit Play in the editor to start the desktop client. You will see the desktop player headset appear at the Axis Visual and can use the mouse to drag the desktop player’s controller in the scene. You can pick up and move the cube on the desktop using the left mouse button.
Add Marker Co-location
Marker tracking can be used to align the origins for two headset users in the same room. To set this up:
- Move the Movable Cube to be a child of the Shared Reference Point object in the scene.
- From Assets > Magic Leap > PhotonFusionExample >Prefabs, drag the Marker Tracker and Marker Tracker Controls prefabs into the scene hierarchy.
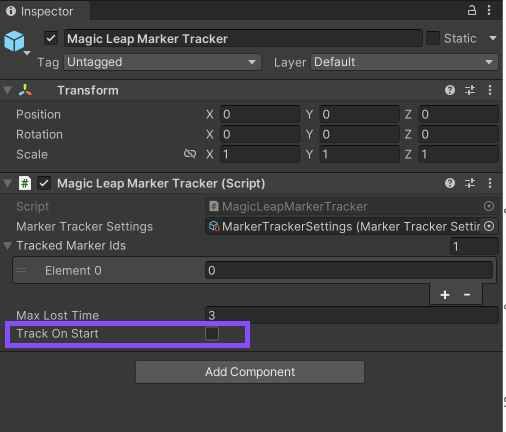
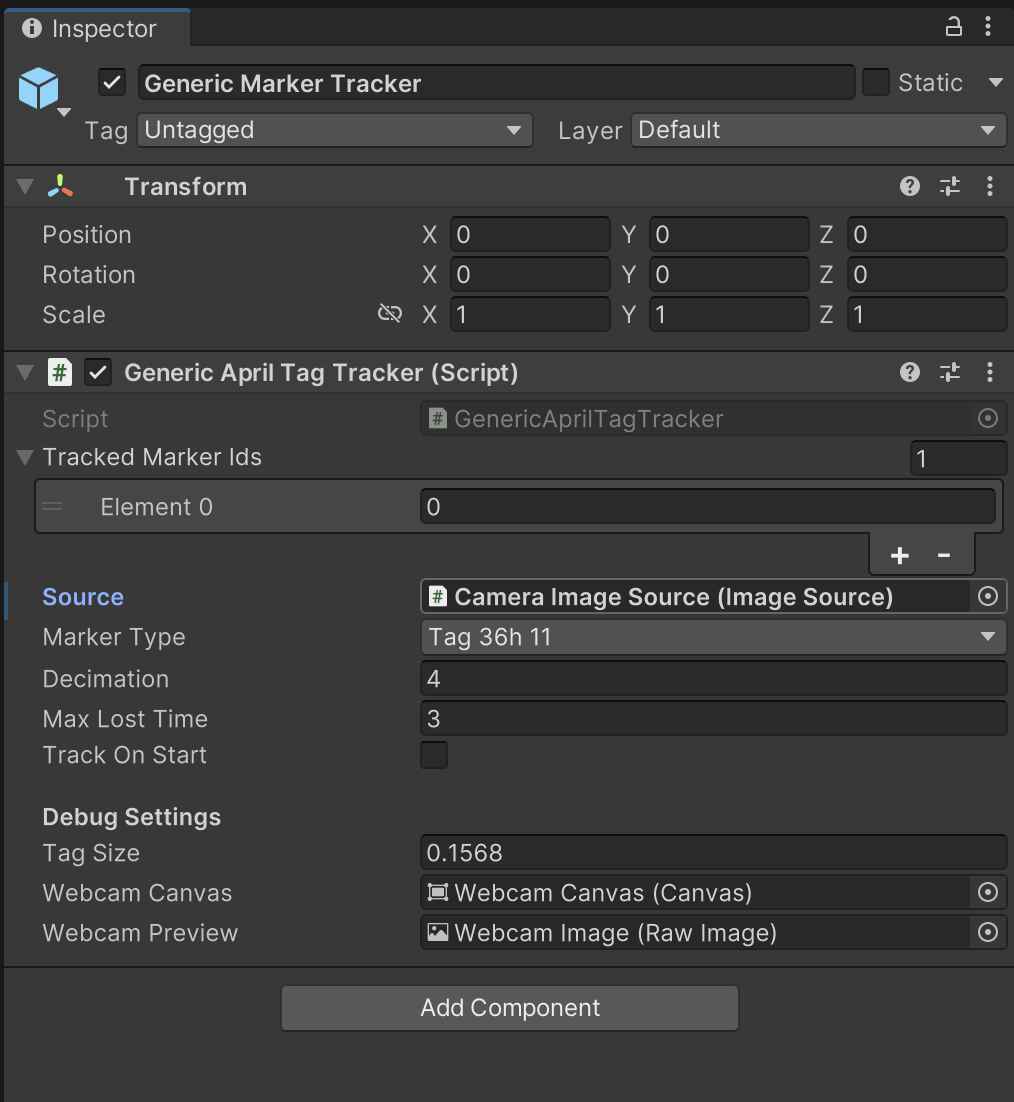
The Marker Tracker prefab contains both the Magic Leap Marker Tracker used on headset and the Generic Marker Tracker used on desktop.
The Marker Tracker Controls provide a simple UI for gathering samples and disabling the marker tracking after the marker has been found to save processing power.If you’d like to track the marker continuously, enable the Track on Start checkbox in the Marker Tracking Controls script.
- To enable marker tracking on desktop, select the Generic Marker Tracking prefab in the hierarchy and in the Image Source field select the Camera Image Source object.
- Select the Marker Tracking Controls prefab in the hierarchy and assign the Shared Reference Point object as the Virtual Fiducial Marker in the Marker Tracking Controls script
Now you just need to print the marker from the Marker folder so it can be held up to the desktop webcam to calibrate the scene origin to the marker.
- Expand the Generic Marker Tracker object in the scene and select the Webcam Canvas child. In the Canvas Render Camera field, set the camera to the second Main Camera object. This will select the desktop webcam as the target for the canvas. You may also want to move the canvas back if it is obstructing other objects in the scene.
- Save the scene
- Build and run the updated scene on the device.
- Hit Play in the editor.
Calibrate the Scene to the Marker
On the Desktop
- Press Play in the Editor
- Press M and hold up the printed marker to the webcam to calibrate the scene to the marker.
- You will see the Movable Cube appear on top of the marker.
On the Headset
- Press the Menu button and look at the printed marker to calibrate the scene to the marker
- You will see the Movable Cube appear on top of the marker
Colocation using Anchors
Reference the Anchors example scene to understand how networked scene origins can be calibrated without marker tracking using Spatial Anchors.