Soundfield Audio Plugin for Unreal Engine
This guide shows you how to set up the Soundfield audio plugin for Unreal Engine 5 and use it to spatialize audio in your apps.
You can use Unreal Engine 5 to create apps for Magic Leap 2 devices if you're using the version of Unreal Engine 5 for Magic Leap with the Magic Leap 2 Unreal SDK.
Soundfield audio is sometimes referred to as Magic Leap Soundfield Audio or MSA.
Prerequisites
Install and set up Unreal Engine 5 and the Magic Leap 2 Unreal SDK. See Getting Started with Unreal Engine.
Start and save a project with the Unreal Editor. You configure each of your projects for Soundfield audio.
Install the Soundfield plugin
- Open the Magic Leap Hub and open Package Manager.
- Select the All tab.
- Scroll down to the Soundfield Plugin for Unreal Engine and select it.
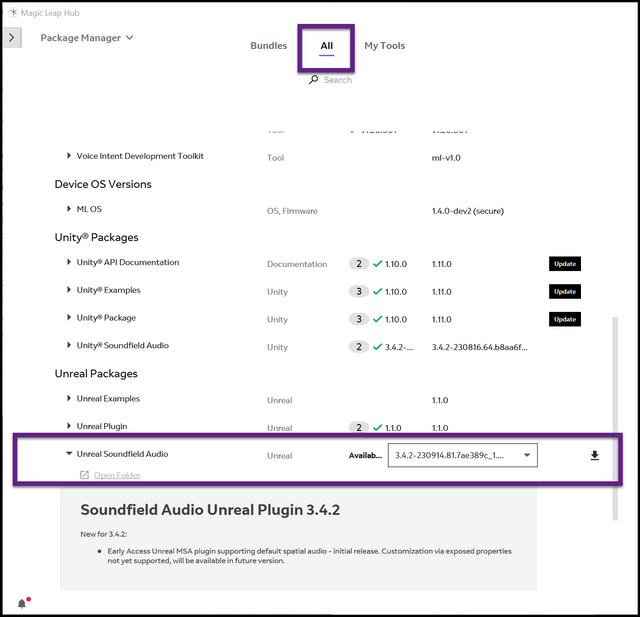
The Soundfield plugin in the Magic Leap Hub. - If you're installing the plugin for the first time, click the download icon. If you're updating the plugin, click Update.
- Click Apply Changes in the side panel.
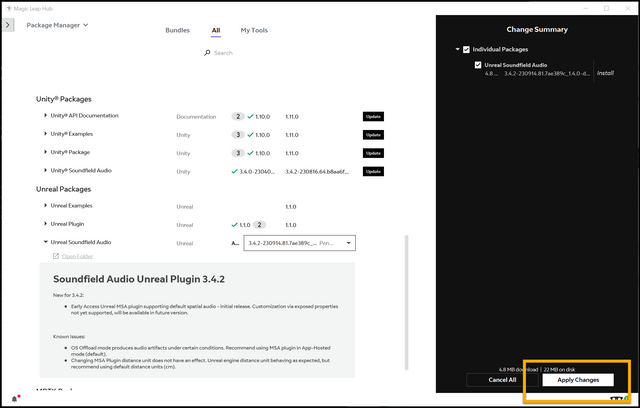
Apply the changes you selected in the Magic Leap Hub. - To see where the plugin was saved on your computer, click the Open folder link , just under the plugin, in the right panel of the Magic Leap Hub.
Configure an Unreal project for Soundfield audio
To configure an Unreal project for Soundfield audio, copy the Soundfield plugin into your project file and enable it in the Unreal Editor.
To copy the Soundfield plugin to your project folder:
- Find the sub-folder named
Soundfieldwithin the folder that was downloaded from the Magic Leap Hub. - In your Unreal Projects folder, go to the folder for the project you want to configure for Soundfield audio.
- If you don't have a folder named
Pluginsin your Unreal project folder, create one. - Copy the
Soundfieldfolder containing the Soundfield (or MSA) plugin to thePluginsfolder in your Unreal project folder. This example shows how to do this for a Unreal project calledHelloCube.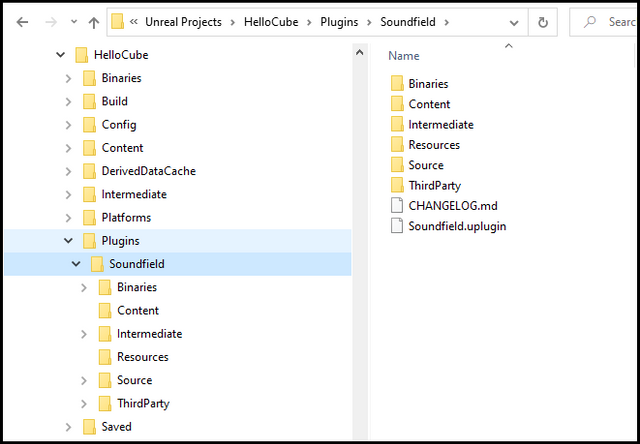
Copy the Soundfield plugin folder to the folder of an Unreal project called HelloCube.
To enable the Soundfield plugin in the Unreal Editor:
- Open your project in the Unreal Editor.
- When prompted, recompile the Soundfield plugin.
- When prompted, update your Unreal project.
- From the Unreal Editor main menu, select Edit > Plugins to open the plugins window.
- Select Audio from the project list.
- Enable the Soundfield plugin by selecting the checkbox next to it.

The Soundfield plugin in the Unreal Editor plugin window. - From the Unreal Editor main menu, select Edit > Project Settings.
- In the project settings search bars, search for "plugin".
- Select Windows from the list of platforms on the right.
- Choose Soundfield as the Spatialization Plugin and the Reverb Plugin settings.
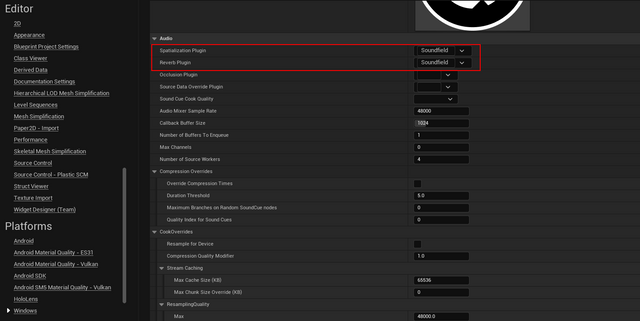
Audio plugin set to Soundfield in Windows platform project settings. - Select Android from the list of platforms. Choose Soundfield as the Spatialization Plugin and the Reverb Plugin settings.
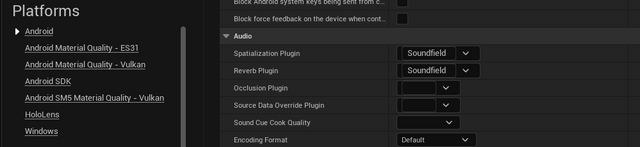
Audio plugin set to Soundfield in Android platform project settings. - Select Soundfield from the list of plugins on the right to confirm or edit the Soundfield plugin settings.
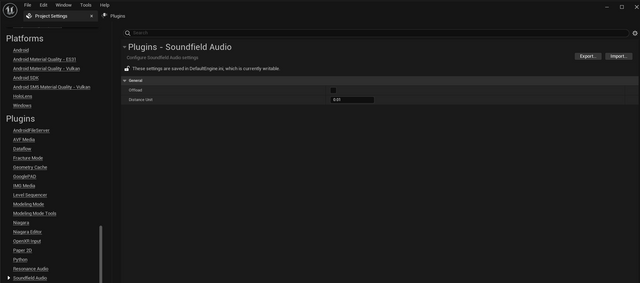
The Soundfield plugin the project settings.
Spatialize sounds with the Soundfield plugin
To spatialize a sound in your project:
- In the Content Browser of the Unreal Editor, select the Content folder.
- Click the +Add icon to create a new folder. Name the new folder Audio.
- Select the Audio folder you created.
- Import a .wav file into your project using the Import button.
- Drag and drop the .wav file into the project map. This creates one AudioComponent actor. The AudioComponent actor has the same name as the .wav file and is Type(AmbientSound).
- Select the AudioComponent actor that you just created.
- In the Details tab, under Attenuation, enable Allow Spatialization and Override Attenuation.
- In the Details tab, under Attenuation (Spatialization), change Spatialization Method to Binaural.
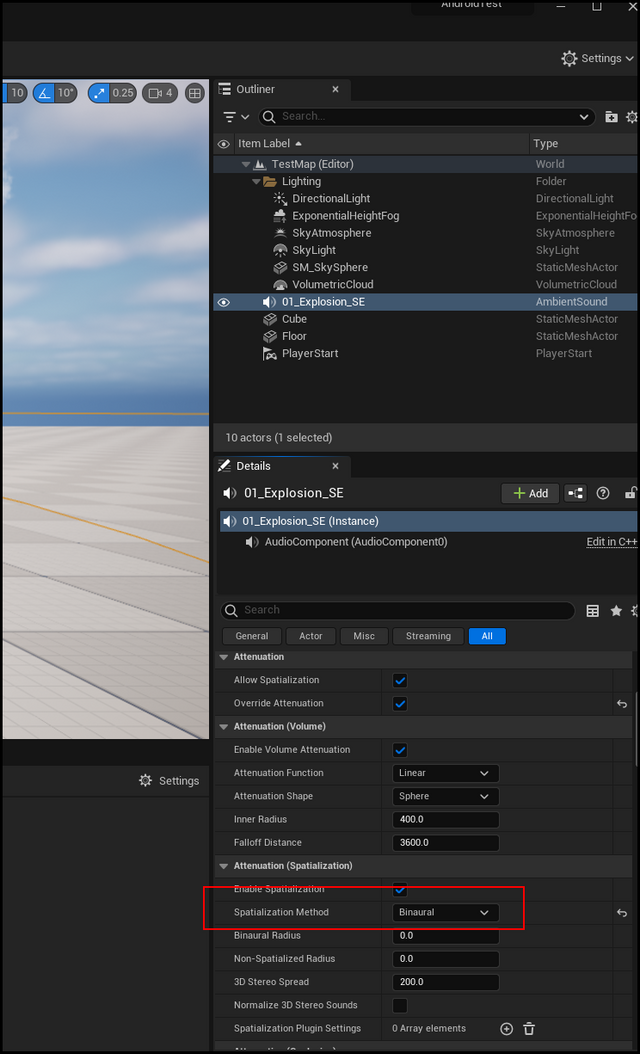
Spatialize a sound in your Unreal project.
Create a sound cue
To create sound cue for an audio clip:
- In the Content Browser, go to the Audio folder you created, and right-click an imported audio clip. Select Create cue to create a sound cue asset. Double-click the sound cue asset to open it.
- Optional: If you want to make this sound cue a looping audio clip: a. In the sound cue working area (the grid with the Wave Player component), right-click and add a Looping component. b. Left-click and drag the Wave Player output to the Looping component input. This connects the Wave Player output to the Looping component input. c. Left-click and drag the looping component output to the final Output component to connect them.
- Select the Output component and select the Attenuation Override checkbox to see more options.
- Under Attenuation (Spatialization), select the Enable Spatialization checkbox and change Spatialization Method to Binaural.
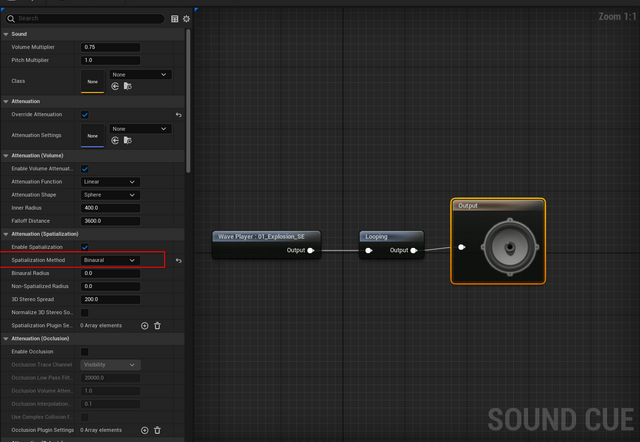
Create a sound cue for an audio clip in your Unreal project. - Save and close the sound cue.
Create a sound attenuation asset
Sound attenuation assets can be re-used by multiple spatialized audio assets in your project. If you plan to use this sound attenuation asset with multiple sound assets, give it a name that will make sense to you and other people working with the asset.
To create a sound attenuation asset:
- Right-click in the Content Browser to open the Sounds tab. In the Sounds tab, select Sound Attenuation.
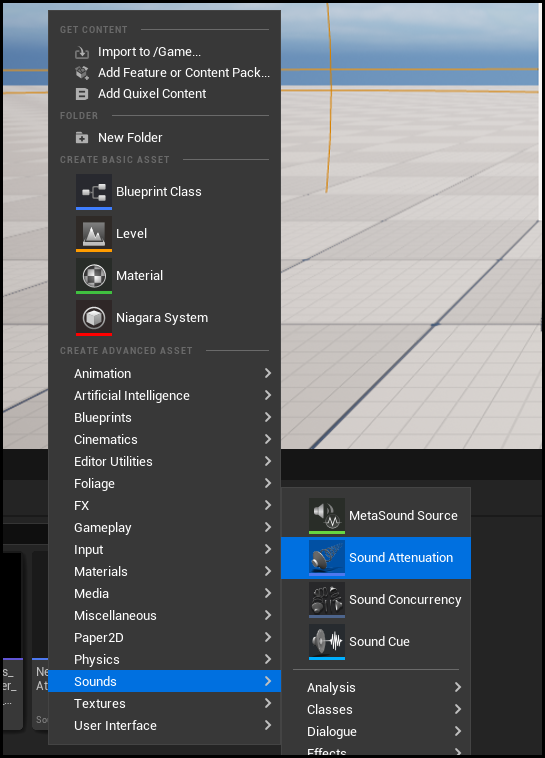
Create a sound attenuation asset. - Double-click the sound attenuation component (NewSoundAttenuation) and open it for editing.
- Under Attenuation (Spatialization), select the Enable Spatialization checkbox and change Spatialization Method to Binaural.
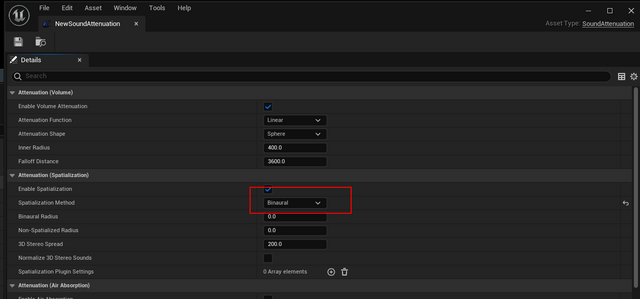
Edit a sound attenuation asset. - Under Attenuation (Volume), select the Enable Volume Attenuation checkbox. Set the inner radius and the falloff distance to the values you want. The values are shown in centimeters.
- Save and close the sound attenuation asset.
- In the audio component or sound cue, assign the attenuation asset to the Attenuation Settings property. If you don't see Attenuation Settings, uncheck the Override Attenuation.
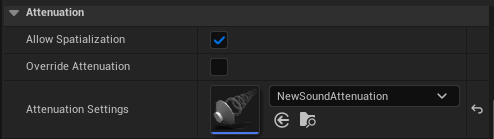
Assign an attenuation asset to Attenuation Settings - Close and save the audio component or sound cue.
The audio asset should now be spatialized in The Unreal Editor and in built apps.
The audio asset can be parented to an object in the scene and will be spatialized to the location of the object. Set the Sound source transform to 0,0,0 prior to parenting.