Marker Tracking
Marker Tracking with the Application Simulator
This guide explains how to use the marker tracking feature in Magic Leap's Application Simulator in Simulator, Hybrid, and Device modes. Walk through how to use the marker tracking feature in the Application Simulator.
Prerequisites
Make sure the Magic Leap Hub and Magic Leap Application Simulator is installed.
Simulator and Hybrid Modes
In these two modes, you are going to add "virtual" markers in your "virtual room." The Application Simulator detects the markers based on what your application specifies to detect, and notifies your application. Do the following:
Start the Application Simulator.
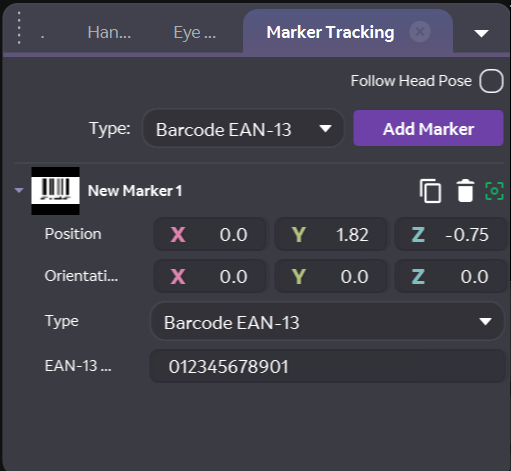
Go to the Marker Tracking panel and click the Add Marker button.
- If it's your first time adding a marker, you get a prompt stating that Application Simulator needs to install support in the current SDK for creating markers.

- Click OK to start the installation (you cannot create a marker successfully until you complete the installation). After installation, if you create a marker, you can see your new marker in:
- Device View
- Marker Tracking tab
- Tracked Objects section under Scene Graph
After you have a marker, click the Duplicate button (it's the icon that looks like two stacked rectangles, to the right of your marker) to create a new marker by copying.
You can remove a marker by clicking the Delete button (it's the trash can icon to the right of the marker you wish to delete).
You can track your marker using the icon depicting a square with a circle in the middle. If the icon is green, the marker is being tracked actively by your headset. When your marker is partially out of view, the icon will turn red, indicating that the tracking is unreliable. If you see the icon is gray, the marker is out of view, and your headset is no longer tracking it.
You can rotate any marker by changing its orientation using X, Y, and Z.
You can also change the type of marker using the Type drop down. Choose from Barcode EAN-13, Barcode UPC-A, QR Code, or Aruco ID. You should see the marker image change accordingly in the Device View.
Device Mode
In this mode, the Magic Leap 2 device detects any markers in the physical world per specification from your application, and notifies your application.