Application Simulator Setup
Follow this guide to set up Application Simulator for use in your development cycles.
System Requirements
Intel integrated graphics are not supported. Consult the tables below for the minimum and the recommended system requirements.
Minimum System Specs
| Item | Specification |
|---|---|
| CPU | Quad-core Intel or AMD, 2.5 GHz |
| Memory | 2 GB RAM |
| Graphics | NVIDIA Geforce or AMD Radeon graphics. PC graphics cards must be Open GL 4.3 conformant. Mac graphics cards must be Open GL 4.1 conformant. Minimum resolution of 1280x1024 is expected. |
| Operating System | Windows 10 (64-bit) or macOS Sierra (10.12) |
| Administration | Administrator access to your computer's operating system |
Recommended System Specs
| Item | Recommendation |
|---|---|
| CPU | 8th-generation Intel i7 (6 cores, 12 threads with hyperthreading) |
| Memory | 8 GB RAM |
| GPU | PC: NVIDIA 1070 GTX or later with recent GeForce drivers. Mac: NVIDIA Geforce or AMD Radeon GPU. PC graphics cards must be Open GL 4.3 conformant. Mac graphics cards must be Open GL 4.1 conformant. |
| OS | Windows 10 (64-bit), macOS Sierra (10.12) to macOS Monterey (12.6) |
| Gamepad (optional) | Any gamepad recognized by your host OS as a USB gamepad. Microsoft Xbox controllers on macOS require support from 360Controller. |
Installing Application Simulator
Typically, you install the Application Simulator as an optional component when installing bundles with the Magic Leap Hub's Package Manager. If the Application Simulator activity card is already present in the Magic Leap Hub (ML Hub), it means you already installed Application Simulator, but the Application Simulator Runtime package may need to be updated when you update the ML Hub (the app lets you know if this is required).
If the card is not present, you can install Application Simulator in the ML Hub as follows:
- Launch the ML Hub.
- Click Package Manager.
- Click the All tab.
- Go to Magic Leap Hub Modules > Magic Leap Application Simulator, and then click the Install icon.
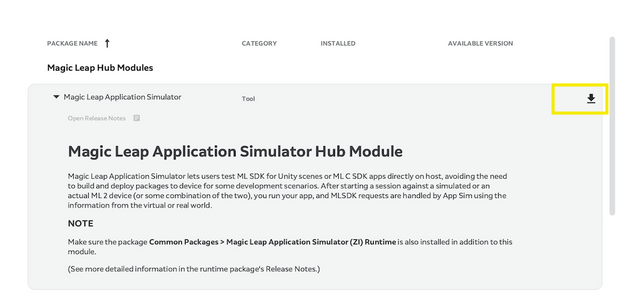
- Verify that you added the Magic Leap Application Simulator (ZI) Runtime package to the Change Summary pane. If not, find and add it under Common Packages.
- Click Apply Changes.

- Restart the ML Hub when prompted to do so.
Starting Application Simulator
The first time you use Application Simulator, you need to make an SDK and target selection:
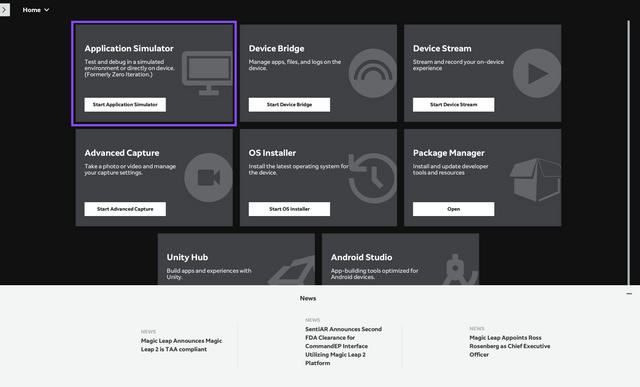
- Click Start Application Simulator on the Application Simulator activity card in the ML Hub. The Application Simulator module workspace appears, and the Target Selector dialog automatically comes up.
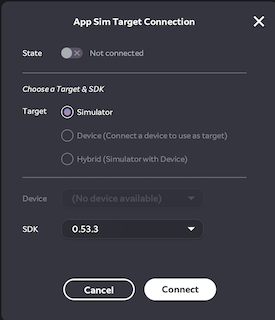
Select an installed SDK, and then a target as follows:
Simulator: If you do not have a device, Application Simulator can render graphics to a window that is a composite of simulated headset graphics on top of 3D geometry of a virtual room. Headpose, controller input, gestures, and similar sensory input is simulated through a GUI. The 3D geometry in the virtual room services world reconstruction requests (meshing, planes, raycast). When iterating using the Simulator, your app's content is composited together with a depiction of your virtual room and rendered to the Device View.
Your Device: If you have a device, Application Simulator can stream the rendered frames to the headset. Headpose, controller input, gestures, and similar sensory input is sent from the device to the computer. You are able to effectively preview the app without needing to go through a time-consuming build and deploy process.
Click Connect.
For launching future Application Simulator sessions using the same SDK and target, you can toggle the State slider from Off to Running. The Target dropdown maintains a history of recent launches, allowing convenient switching.