Simple Grab Interaction
This document provides step-by-step instructions on how to create a cube that can be selected, grabbed and manipulated using Unity's XR Interaction Toolkit and the sample scene created in the Building a Simple App guide.
The Unity XR Interaction Toolkit (XRI) package provides developers with general XR interactions and scene understanding. This tutorial will apply the XRI XR Grab Interactable script to a cube, turning it into a grabbable object that can be picked up by the user's controller and respond to controller hover behaviors by changing its color when the controller hovers, selects and deselects the cube. By the end of this guide, developers should have a better understanding on how to use the XR Grab Interactable script to allow Magic Leap 2 users to interact with GameObjects in the scene.
Prerequisites
Enabling Controller Input
You can learn more about what each portion of this script does in the Controller input Unity guides.
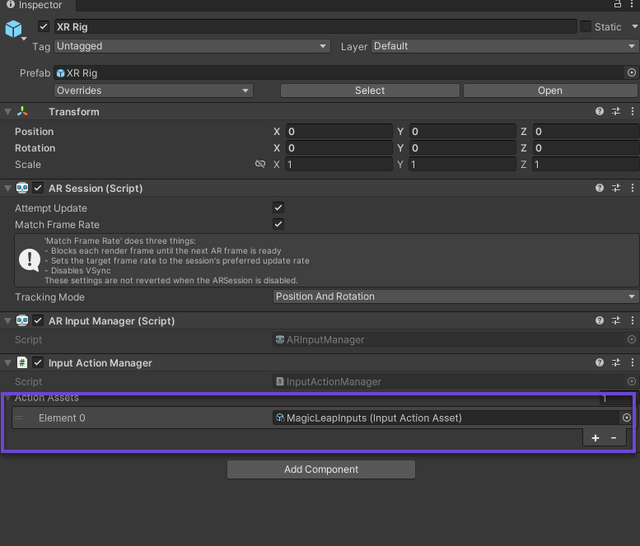
- Select the XR Rig prefab in the scene and in the inspector make sure that the Action Assets in the Input Action Manager script are set to Magic Leap Inputs (Input Action Asset).
Adding Unity XR interaction
This section will utilize a Unity XR Interaction script allowing the user to grab the cube created in the previous tutorial.
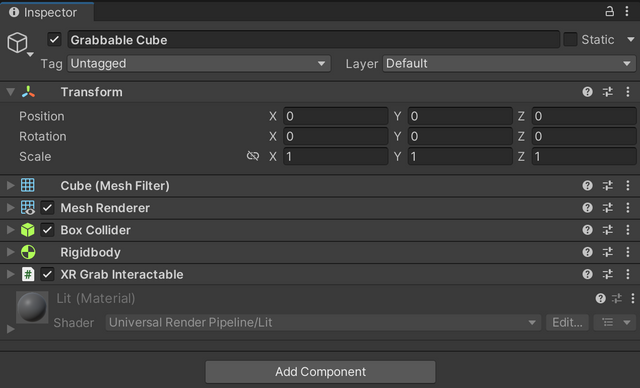
Selected the previously created cube from Building a Simple App and rename it to Grabbable Cube.
Add a box collider to the Grabbable Cube if it is not already present. This will allow for raycasts from the XR Ray Interactor script on the controller to be detected by the cube.
In the scene hierarchy, right click in an empty space and select XR > Interaction Manager to add a new XR Interaction manager to the scene.
- The XR Interaction Manager script act as an intermediary between Interactors and Interactables in Unity's XR Interaction Toolkit (XRI) and many of the methods on Interactors and Interactables in Unity XRI are designed to be called by the Interaction Manager instead of directly in order to maintain consistency between both targets of an interaction event.
Select the Grabbable Cube and in the inspector click Add Component > XR Grab Interactable.
The XR Grab Interactable script is an Interactable component that hooks into the interaction system (via XRInteractionManager) to allow basic "grab" functionality. Can attach to a selecting Interactor and follow it around while obeying physics (and inherit velocity when released).
For the actions to work properly, the input objects (the controller in this case) Requires the XR Controller component, which translates the input actions into generic XR Input events, and XR Ray Interactor component, which controls the Ray and the interactor's properties.
Select the Grabbable Cube.
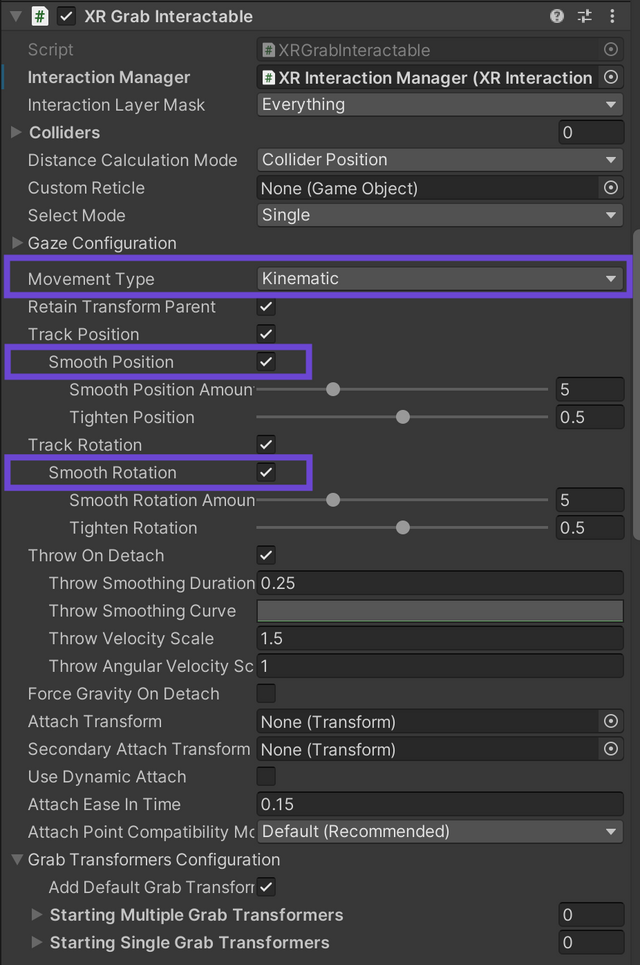
Navigate to the XR Grab Interactable component and set the Interaction Manager to the newly created XR Interaction Manager object.
Optional: Enable the Smooth Position and Smooth rotation parameters of the XR Grab Interactable script to increase the fluidity in the cube's motion.
8.Enable Is Kinematic on the Grabbable Cube's Rigidbody script to prevent the object from falling to the ground at the start of the application and ignore forces such as velocity.
Select the Game Controller from the scene hierarchy (XR Rig/Session Origin/Game Controller).
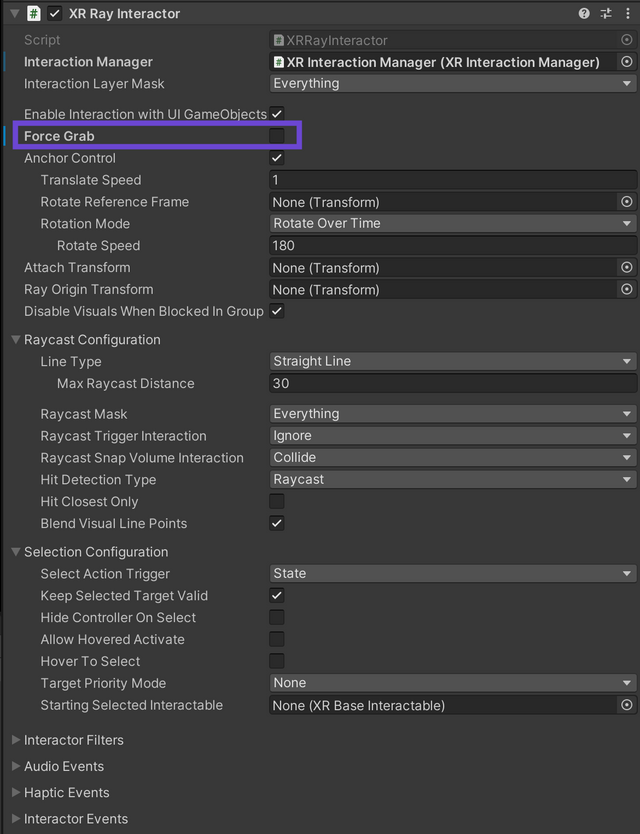
In the Inspector, find the XR Ray Interactor script attached to this object. Drag the XR Interaction Manager from the scene into the XR Interaction Manager slot in the script.
Deselect the Force grab option to allow for the Grabbable Cube to be manipulated at a distance instead of sliding to the controllers location when grabbed:
Adding Hover Interaction
One of the features of the XR Grab Interactable Script is that it allows the grabbed object to respond hover events. This section will explain how to change the Grabbable Cube's material on different hover behaviors.
Create 3 new materials (Assets >Create > Material) and name them Cyan, Magenta and Yellow.
Set the materials' colors as follows: Cyan (00FFFF), Magenta (FF00FF), and Yellow (FFFF00)
Select the Grabbable Cube
In the inspector, find the XR Grab Interactable script and scroll down to the Interactable Events section to see hover event options.
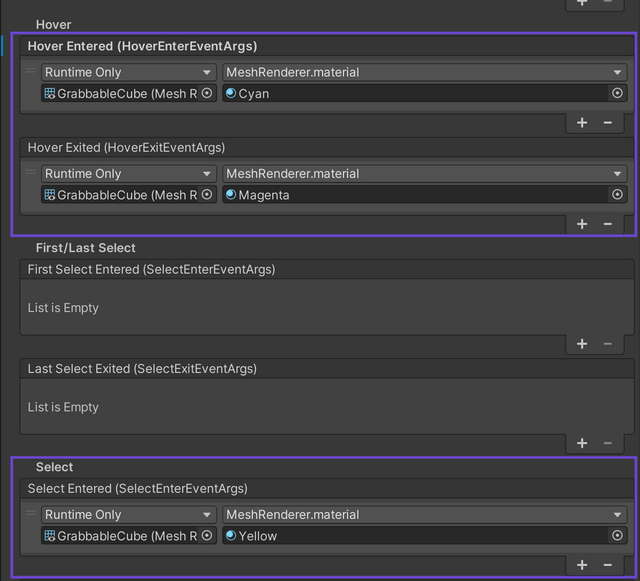
Under Hover Enetered, drag the Grabbable Cube into the Object slot and in the function dropdown select MeshRenderer > Material. Then drag the Cyan material into the material slot.
Repeat the same step for Hover Exited using the Magenta material and Select Entered using the Yellow material.
The final Hover actions will look like this:
Test the project
- Save the scene.
- Make sure the device is connected to the computer.
- Go to File>Build Settings, select the current scene and click Build and Run.
You should be able to pick up the cube by hovering over the cube with the controller ray and pressing the trigger, and release it by letting go of the trigger button. The cube will change colors based on the controller's hover behavior.