Remote Rendering with Unreal Engine 5
Performance for Remote Rendering is highly dependent on the capabilities of the host machine that is running Unreal Engine. Noticeable lag may be a result of insufficient processing or GPU power.
In the future, an official plugin will provide more accurate mappings for Controller input.
Prerequisite
Remote Rendering Setup Instructions with the Remote Rendering Service.
Setup
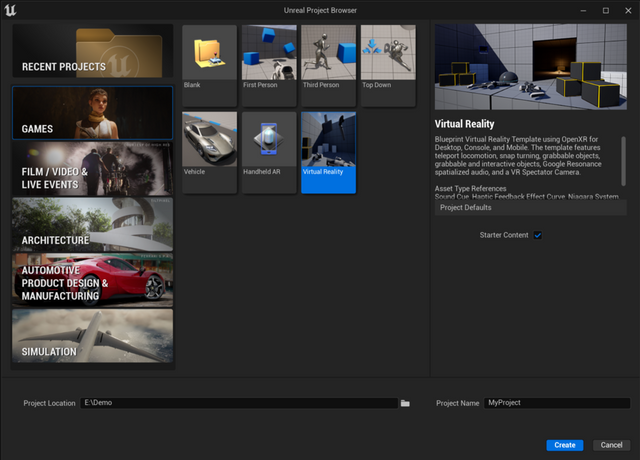
- Create a New Project with the Virtual Reality Template.
It is recommended that you start the Remote Rendering service ahead of time. But, if it’s not running yet, the Remote Rendering service will be started automatically.
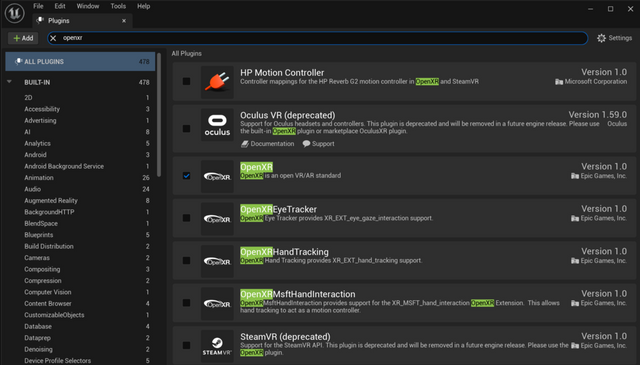
- Enable OpenXR.
If you’re using the Virtual Reality template in Step 1, this step will not be necessary. When not using VR template, make sure to go through those setting before proceeding.
- Make sure the OpenXR plugin is installed in Edit -> Plugins.
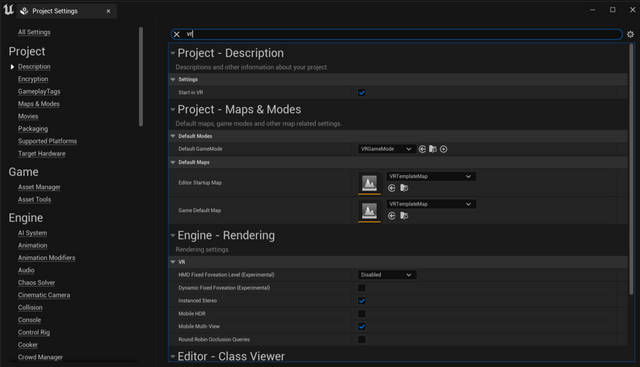
- Make sure
Start in VRis enabled in Edit -> Project Settings.
- Set the RHI to
Vulkan.
Under Edit -> Project Settings:
- Under Platforms in the left sidebar, select Windows.
- Under Targeted RHIs, select
Vulkanas theDefault RHI.
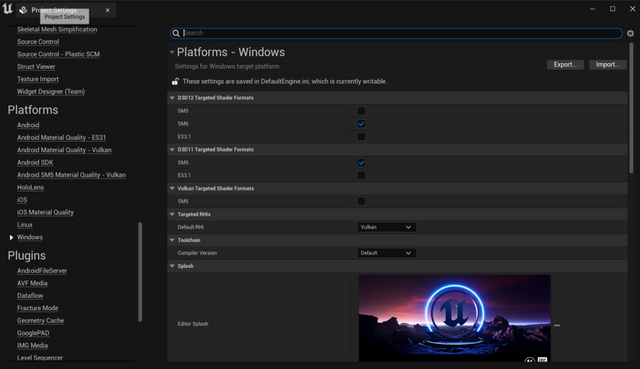
- Click Restart Now.
Vulkan is the main supported graphics API for Magic Leap Remote Rendering. Support for DirectX 11 and DirectX 12 are considered experimental.
Using the Magic Leap Unreal Plugin SDK
Several of the plugins included in the MagicLeap Unreal sdk can be used with Magic Leap remote rendering.
The following plugins are supported:
Magic Leap OpenXR (partial, required for the other plugins in this list), Magic Leap Controller, Magic Leap Hand Interaction, Magic Leap Light Estimation, Magic Leap Localization Map, Magic Leap Marker Tracking, Magic Leap Planes
Other plugins in the SDK rely on apis that are not supported by the Magic Leap remote rendering service.
If you are using a build of Unreal Engine that does not already have the SDK installed (eg- if you downloaded the official build of Unreal Engine 5.4 using the Epic Games Launcher), you will need to download and compile the SDK in your project if you want to use MagicLeap plugins.
To build the plugin sdk with your project, first ensure that the Unreal editor and Visual Studio are not running.
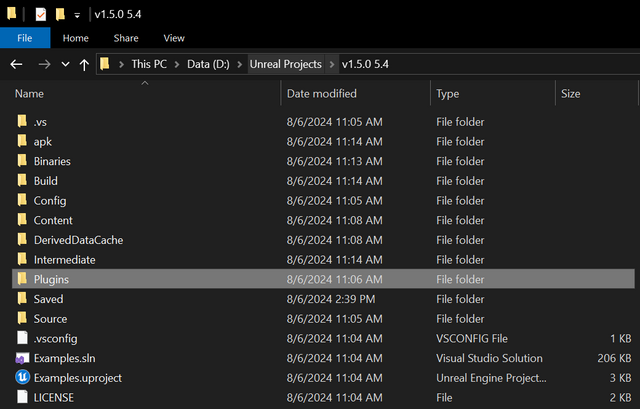
Open your project root directory and create a 'Plugins' folder. The folder must be named 'Plugins'. Create a 'MagicLeap' folder inside of the Plugins folder.
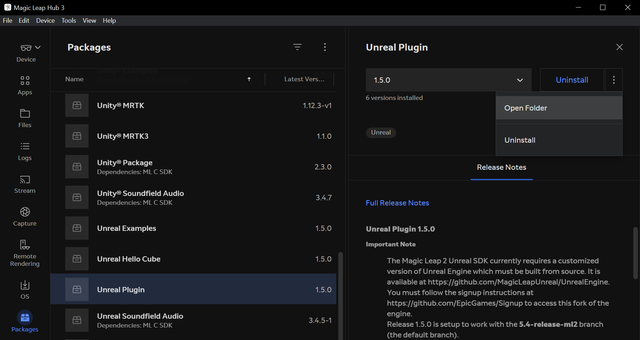
You can download the latest version using the ML Hub package manager. Click Open Folder in the details panel to open the folder that contains the source code for the plugin sdk.
Copy the contents of the sdk folder into the MagicLeap folder that you just created.
Launch the Unreal editor and open your project. Magic Leap plugins will be available to enable in the plugin browser. (Edit menu -> Plugins in the Unreal editor)
After you select the plugins that you would like to use, you will see a prompt to restart the Unreal editor. Click Restart Now.
You will see a prompt appear warning you that the plugins are missing. Click yes to compile the plugins.
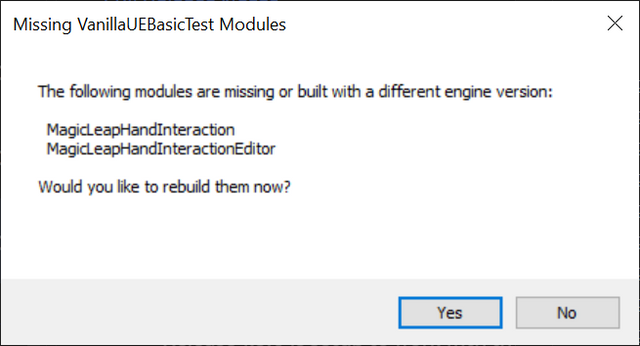

After compilation finishes, the editor will reopen with your project and you can use the plugins that you selected.
Alpha Channel in Unreal Engine 5
Magic Leap's Remote Rendering now supports alpha channels, which provides the user with segmented dimming and higher quality capture.
In order to take advantage of this feature in Unreal Engine OpenXR applications, you must first enable and control the output of the alpha channel.
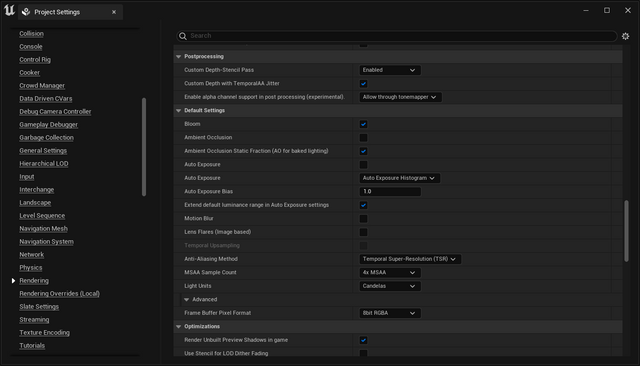
You must prepare the application by allowing the engine to output alpha for postprocessing in the first place.
Go to Project Settings -> Rendering -> Postprocessing and set Enable alpha channel support in post processing to Allow through tonemapper.
The alpha channel as exposed by Unreal Engine is not enough for alpha blend layers in OpenXR, this is entirely due to the fact that the alpha output is inverted.
In order to correct this you must create a post-processing material that inverts the value of the alpha channel before it's submitted to the Remote Rendering service. Do the following:
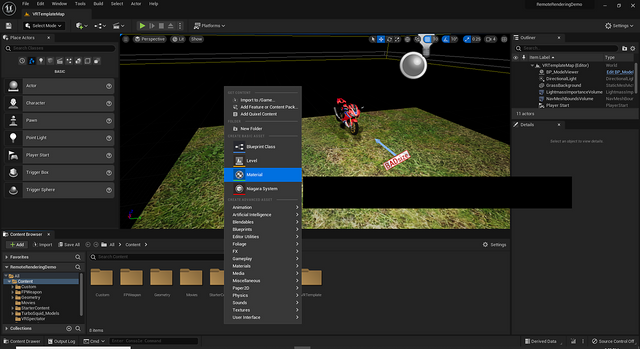
- Go to Window and enable the Content Browser. From the Content Browser, add a new material in the desired directory.
The newly-created material must first be set up as a post-processing material with alpha support.
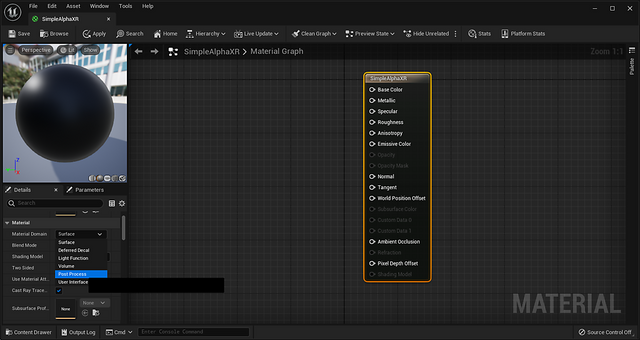
In the Content Browser, open the Material Editor by right-clicking on the material and selecting Edit.
Select the material in the Material Graph and under Material category set Material Domain to
Post Process, then under the Post Process Material category enableOutput Alpha.
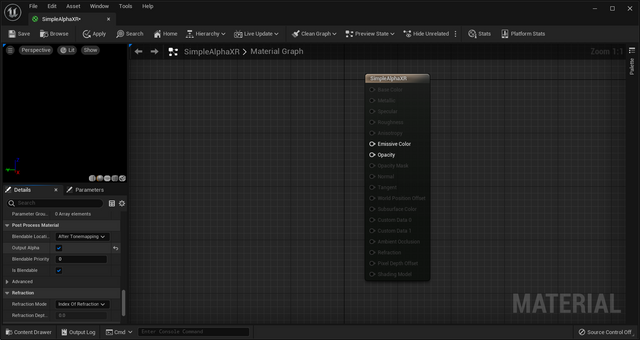
Now you may proceed to creating the material, in this example alpha is being inverted directly from the post-processing input.
Creating Material
- Add a new SceneTexture node and set Scene Texture Id to
PostProcessInput0. This will be the main color input the material that will be worked on.
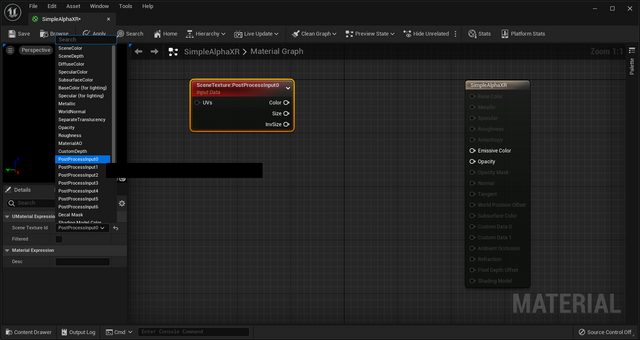
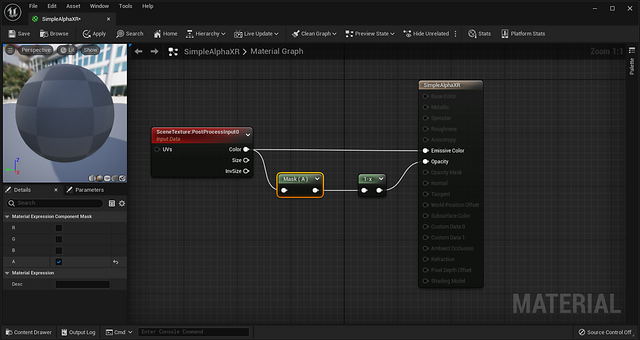
The RGB channels will not be changing at all, so connect SceneTexture.PostProcessInput0:Color output to your material's Emissive Color input.
Add a ComponentMask node and a OneMinus node, then pipeline SceneTexture.PostProcessInput0:Color output through the ComponentMask node (set to
Alphaonly), then the OneMinus node, and finally into the material's Opacity input.
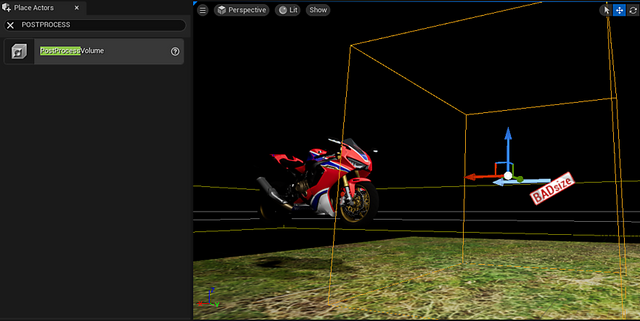
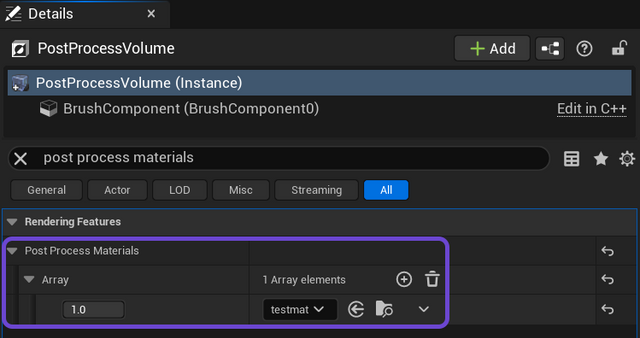
- Add a PostProcessVolume actor in your level, enable
Infinite Extent (Unbound)under its Post Process Volume Settings properties and add your material to Post Process Materials under Rendering Features.

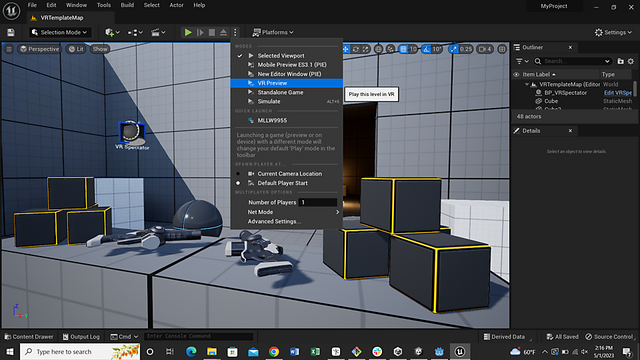
VR Preview
Once the editor has been restarted and shader compilation finishes, simply click VR Preview.