Using Kit In-Scene UI with MagicLeap 2
This document describes how to use the AR Experience plugin with the Magic Leap 2 headset and Omniverse applications. In this tutorial, you will learn how to build kit applications with UX that's designed for use in XR.
Prerequisites
Omniverse | MagicLeap Developer Documentation - this documentation shows you how to set up USD Composer for use with a Magic Leap 2 (ML2) headset and enable the AR Experience plugin.
This version of the AR Experience plugin is an alpha release. The AR Experience plugin for kit is currently in alpha. Not all ML2 platform features are available and the content of this article may change in the future.
Interacting with omni.UI Widgets
Any UI that is part of the Omniverse UI framework can be rendered and interacted with in 3D as a part of in-scene UI. The omni.kit.xr.example.sceneview_utils plugin provides a set of example UI widgets that can be interacted with using the ML2 controller.
Enable Example Extensions
To enable the example extensions:
- Navigate to Window > Extensions.
- Search for usd-based.
- Install and enable the USD-Based SceneUI Example (
omni.kit.xr.example.usd_scene_ui) extension.
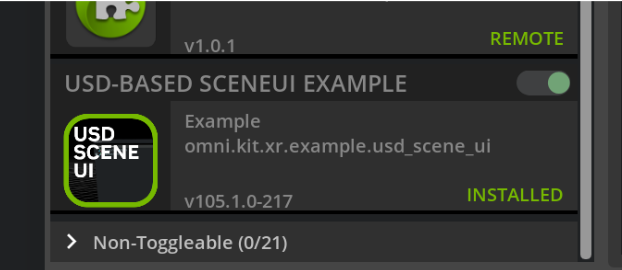
This extension contains a set of examples that show how to use UI Widgets as in-scene UI using the UsdSceneView class provided by the omni.kit.xr.sceneview_utils helper module.
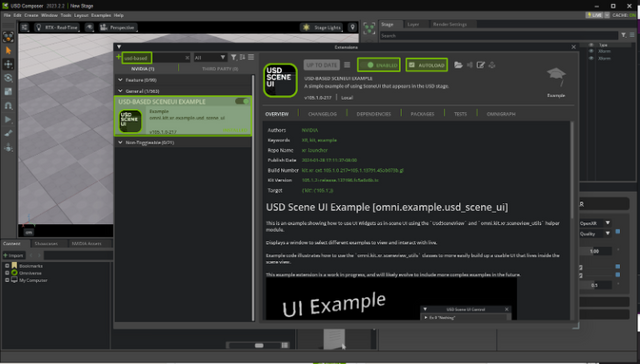
- After enabling the extension a new Menu Item will appear called
Examples.
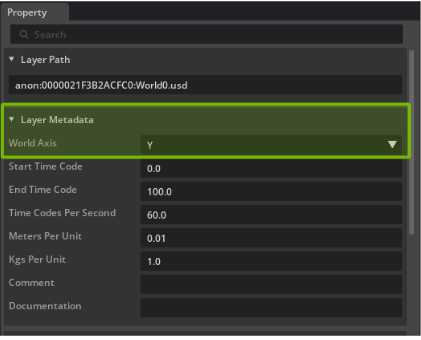
Make sure your stage is Y-Up. Currently, the UI widgets are placed based on Y-Up stages.
Set Current Stage Axis
To set the current stage axis:
Go to the Layer Tab.
Select Root Layer.
Go to the Properties Tab.
Under Layer Metadata, locate World Axis and select the drop-down to change it to Y.
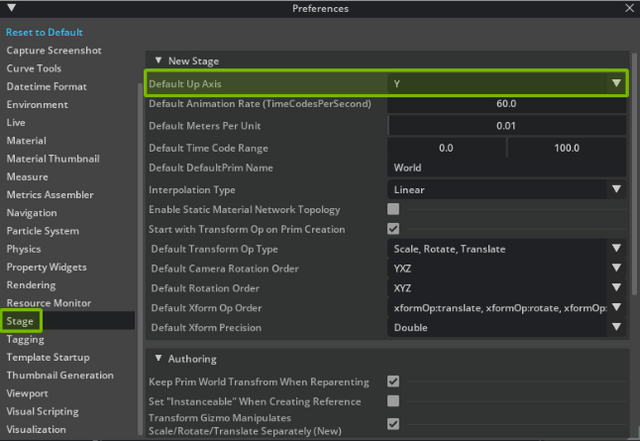
Set Default Stage Axis
To set the default stage axis so that every new stage will have the Up axis based on the default stage axis, do the following:
Go to the Menu item Edit > Preferences.
In the Left tab find and select Stage.
For Default Up Axis, select Y in the drop-down menu.
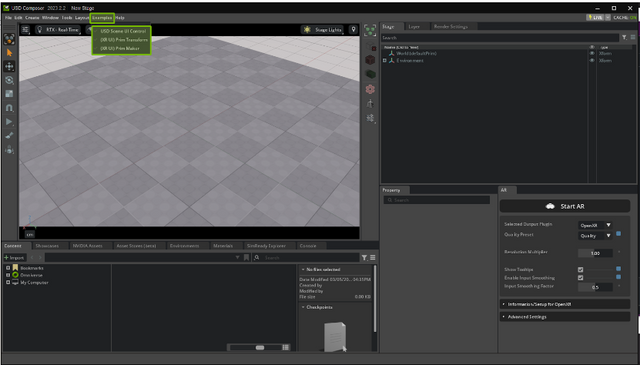
- From the Examples menu, select USD Scene UI Control to see several examples of simple UI widgets.
You can use a combination of UI widgets and spatial input to enable entirely XR based workflows in your kit applications, like USD Composer.
Extensions for Creating Prims
The Scene UI Examples include useful extensions out of the box that you can use to create basic prims in your scene and manipulate using the same TransformAttributeWidget that you would see in the Property panel in USD Composer.
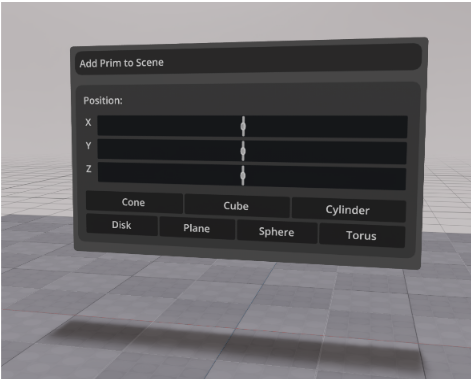
Position refers to the coordinate position for where the prim will appear. Selecting the button for a prim spawns it. For example, pressing the Cube button spawns a Cube prim.
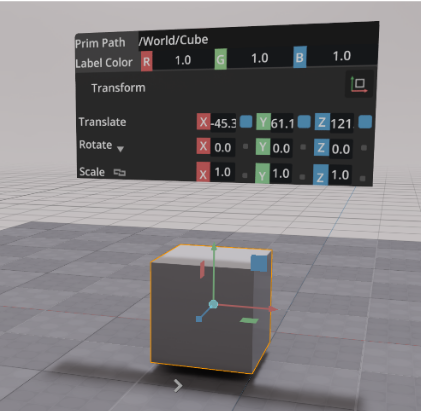
By selecting a prim in the scene a UI that looks similar to the Transform Property in the Property tab appears above the prim. Using the pointer, you can click and drag these values to update and change the prim's transform properties.
Building a New Kit Extension with an Interactive Widget
This section shows an example of how to create a new kit extension with an interactive widget.
We recommend that you install Visual Studio Code and the official Python extension from Microsoft for the best Kit plugin development experience with Omniverse.
You can use the extension template included in Omniverse to bootstrap a new project. To do that, take these steps:
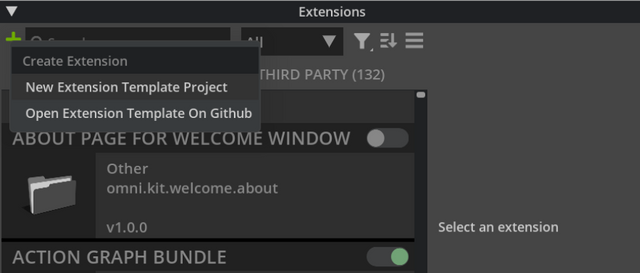
In USD Composer, from the Window menu, select Extensions to open the extension browser.
In the extension browser window, click on the plus button and choose New Extension Template Project.
Select a location to save the extension project files and give the extension a name. (See Omniverse Kit documentation for more information.)
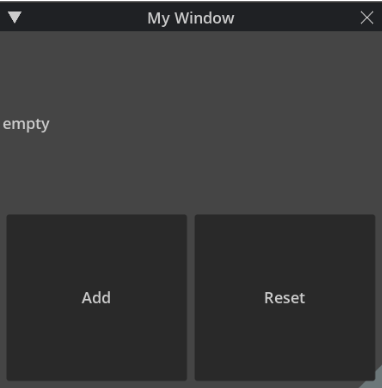
The template generates a Python source file with an extension class that implements a simple UI window that looks like this:
- You can modify the sample UI code for the window to render the same controls as in-scene UI that can be interacted with using the ML2 controller. To do this you can use utility classes that are included with thh
omni.kit.xr.sceneview_utilsplugin out of the box. We will modify the template code to build the UI layout inside of a generic UI Widget that can be rendered inside of a container in the USD scene, instead of a 2D window frame. The original UI layout code generated by the template looks like this:
class MagicleapInSceneUITutorialExtension(omni.ext.IExt):
    def on_startup(self, ext_id):
        print("[magicleap.insceneuitutorial] magicleap in scene ui tutorial extension startup")

        self._count = 0

        self._window = ui.Window("My Window", width=300, height=300)
        with self._window.frame:
            with ui.VStack():
                label = ui.Label("")

                def on_click():
                    self._count += 1
                    label.text = f"count: {self._count}"

                def on_reset():
                    self._count = 0
                    label.text = "empty"

                on_reset()

                with ui.HStack():
                    ui.Button("Add", clicked_fn=on_click)
                    ui.Button("Reset", clicked_fn=on_reset)
# ...
- Take the control layout from the original code, and lift it into a separate class that extends
ui.Widgetas shown:
class MagicleapWidget(ui.Widget):
    def __init__(self, **kwargs):
        super().__init__(**kwargs)
        self._count = 0
        self._build_ui()

    def __del__(self):
        self.destroy()

    def _build_ui(self):
        self._widget = ui.VStack()
        with self._widget:
            label = ui.Label("")

            def on_click():
                self._count += 1
                label.text = f"count: {self._count}"

            def on_reset():
                self._count = 0
                label.text = "empty"

            on_reset()

            with ui.HStack():
                ui.Button("Add", clicked_fn=on_click)
                ui.Button("Reset", clicked_fn=on_reset)
- The
SceneViewUtilshelpers make it easy to render the same UI controls inside a 3D container that can be rendered and interacted with along with other stage content. Add the following imports to your code to access scene view utility classes:
from carb import Float2, Float3
from omni.ui import scene as sc

from omni.kit.scene_view.usd import UsdSceneView
from omni.kit.xr.sceneview_utils import SceneViewUtils, SceneWidgetManipulator
- Use the
_scene_view_utils.create_widget_factoryfunction to create an instance of the widget inside of a container in the scene:
class MagicleapInSceneUITutorialExtension(omni.ext.IExt):
    def __init__(self) -> None:
        super().__init__()
        self._scene_view_utils: SceneViewUtils | None = None
        self._widget_container: SceneWidgetManipulator[MagicleapWidget] | None = None

    def on_startup(self, ext_id):
        print("[magicleap.insceneuitutorial] magicleap in scene ui tutorial extension startup")

        if self._scene_view_utils is None:
            self._scene_view_utils = SceneViewUtils(UsdSceneView)

        self._widget_container = (
            self._scene_view_utils.create_widget_factory(MagicleapWidget)
            .with_size(Float2(600, 300))
            .with_position(Float3(0, 300, 0))
            .with_resolution_scale(3)
            .with_construct_args()
            .with_update_policy(sc.Widget.UpdatePolicy.ALWAYS)
            .build()
        )

    def on_shutdown(self):
        print("[magicleap.insceneuitutorial] magicleap in scene ui tutorial extension shutdown")

        if self._widget_container:
            self._widget_container.clear()
            self._widget_container = None
You should now see the same UI rendered in the scene. The ML2 controller can be used to select the buttons.
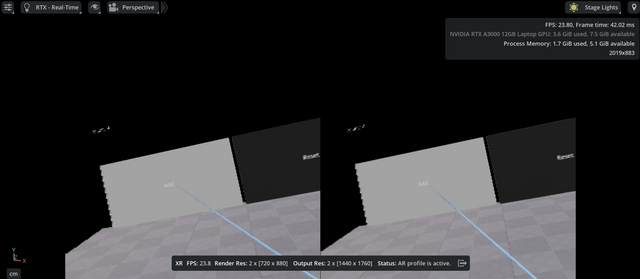
Now that we have a functional in-scene UI, we can experiment with binding functionality to the buttons to manipulate the scene.
Here are two sample functions that you can copy into your extension project to spawn and remove spheres from the scene:
from pxr import Sdf
from omni.timeline import get_timeline_interface

# Spawn a sphere prim in the scene
def spawn_sphere():
    # Ensure stage
    stage = omni.usd.get_context().get_stage()
    if stage is None:
        return

    # Ensure that the timeline is set to play to see physics act on the sphere.
    timeline = get_timeline_interface()
    if timeline.is_stopped():
        timeline.play()

    # Generate a path for the sphere
    sphere_path = Sdf.Path(omni.usd.get_stage_next_free_path(stage, "/World/Sphere", False))

    # Create a sphere prim with a default transform
    omni.kit.commands.execute('CreateMeshPrimWithDefaultXform',
        prim_type='Sphere',
        prim_path=sphere_path,
        select_new_prim=True,
        prepend_default_prim=True,
        above_ground=True)

    # Pose the sphere prim above the buttons
    omni.kit.commands.execute('TransformMultiPrimsSRTCpp',
        count=1,
        paths=[str(sphere_path)],
        new_translations=[0.0, 350.0, 0.0],
        new_scales=[1.0, 1.0, 1.0])

    # Attach a rigid body to the sphere and watch it fall!
    omni.kit.commands.execute('SetRigidBody',
        path=sphere_path,
        approximationShape='convexHull',
        kinematic=False)

# Delete all spheres from the scene
def delete_spheres():
    # Ensure stage
    stage = omni.usd.get_context().get_stage()
    if stage is None:
        return

    # Find all spheres in the scene
    spheres = []
    for prim in stage.Traverse():
        name = str(prim.GetName())
        if "Sphere" in name:
            spheres.append(prim.GetPath())

    # Delete all of the spheres that were found
    omni.kit.commands.execute('DeletePrims',
        paths=spheres,
        destructive=False)
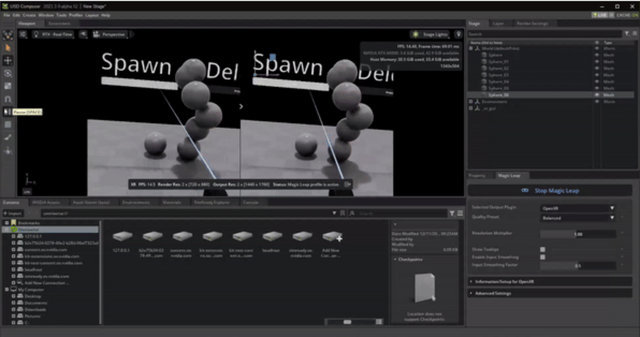
With those two functions added, we can slightly modify the UI widget to bind them to two buttons:
# ui.Button("Add", clicked_fn=on_click)
# ui.Button("Reset", clicked_fn=on_reset)
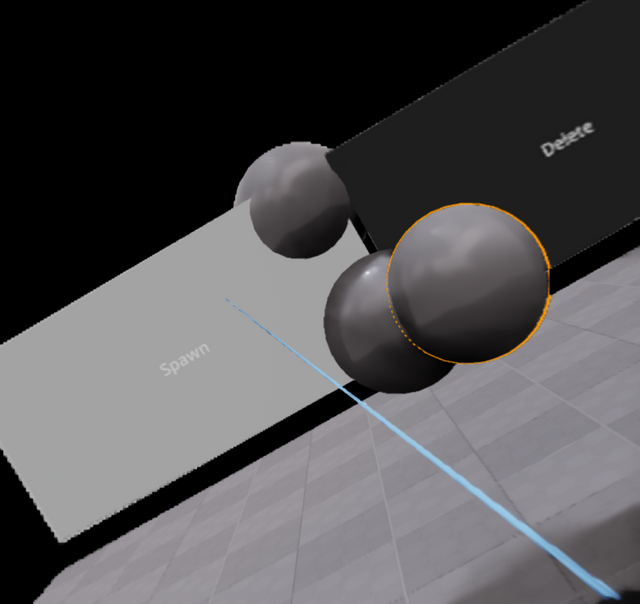
ui.Button("Spawn", clicked_fn=spawn_sphere)
ui.Button("Delete", clicked_fn=delete_spheres)
Pressing the buttons with the ML2 controller will now add and remove spheres from the scene.
Note that, as implemented, attempting to create the UI widget will fail if the plugin is enabled before the stage has opened. This will most likely happen if the extension is set to autoload when the application starts.
We can refactor the code a bit to make the extension robust to this scenario by handling stage events that are raised when the current stage state changes. We want to defer creating the UI until the stage enters the "OPENED" state and destroy it when the stage transitions out of it.
Refactored extension code-
class MagicleapInSceneUITutorialExtension(omni.ext.IExt):
    def __init__(self) -> None:
        # ...

    # Called when this extension is loaded
    def on_startup(self, ext_id):
        print("[magicleap.insceneuitutorial] magicleap in scene ui tutorial extension startup")

        self._stage_evt_handler = omni.usd.get_context().get_stage_event_stream() \
            .create_subscription_to_pop(self.on_stage_event, name="handlestageevents")

        if (omni.usd.get_context().get_stage_state() == omni.usd.StageState.OPENED):
            self._create_widget()

    # Called when this extension is unloaded
    def on_shutdown(self):
        print("[magicleap.insceneuitutorial] magicleap in scene ui tutorial extension shutdown")

        if self._stage_evt_handler:
            self._stage_evt_handler.unsubscribe()
            self._stage_evt_handler = None

        self._destroy_widget()

    # The UI widget can only be instantiated in the current usd stage after one has been opened.
    def on_stage_event(self, e: events.IEvent):
        if e.type == int(omni.usd.StageEventType.OPENED):
            self._create_widget()
        elif e.type == int(omni.usd.StageEventType.CLOSING):
            self._destroy_widget()

    # Leverage SceneViewUtils to create UI elements in the current usd stage
    def _create_widget(self):
        if self._scene_view_utils is None:
            self._scene_view_utils = SceneViewUtils(UsdSceneView)

        if self._widget_container is None:
            self._widget_container = \
                self._scene_view_utils.create_widget_factory(MagicleapWidget) \
                    .with_size(Float2(600, 300)) \
                    .with_position(Float3(0, 300, 0)) \
                    .with_resolution_scale(3) \
                    .with_construct_args() \
                    .with_update_policy(sc.Widget.UpdatePolicy.ALWAYS) \
                    .build()

    # Remove UI elements from the stage
    def _destroy_widget(self):
        if self._widget_container:
            self._widget_container.clear()
            self._widget_container = None
Sample source code is available on GitHub:
https://github.com/magicleap/MagicLeap-Omniverse-In-Scene-UI-Tutorial